
Yall know i love all things Bridgerton, So watch me make a velvet open robe to wesr over my satin gown. The fabric is from the silk baron, and its an absolute dream to sew with. Although it wasnt finished completely, im glad how it turned out, so i will be finishing it once i complete other projects.
Tag: historical dress
The Black Chemise A La Reine
I did it yall! After a long time of wanting to make my own chemise a la reine, I finally did it! Well, this is not my first one. My husband had one made for me in white as a Mothers Day gift like two years ago. Since one of my friends is doing a spooky/dark themed costumed meetup in November, right after Halloween, I definitely wanted a black one.
So to start with, I had to decide whether I wanted to do it from a pattern or from scratch. I headed to Instagram with a poll, and a majority of people suggested the Laughing Moon Chemise A La Reine Pattern. But then others suggested that it wouldn’t be too terribly hard being that at the base of it, it is just rectangular panels with straps and sleeves, so my chaotic goblin sewing brain decided to give that a try.
First, the fabric!!!! I knew that I wanted it black, but didn’t know exactly which fabric to choose. Apparently cotton voile is popular, but on a random trip to a JoAnn fabrics out of town I went the Linen Look Fabric Solid from JoAnn (the fabric content is 85% viscose and 15% linen, and drapes like a dream).
Let’s get in how I went about construction. After doing a lot of online searching, and getting input from friends, I came across the blog post about a simple chemise a la reine from Fresh Frippery’s blog, and decided to go with that. She used 3 panels of 55″ fabric (one back, and two sides). Since I am larger than her and wanted a lot of floor, I went with four panels of 52″ fabric. One back, two sides, and the third panel was cut in half length wise and each one added to the sides, like so:
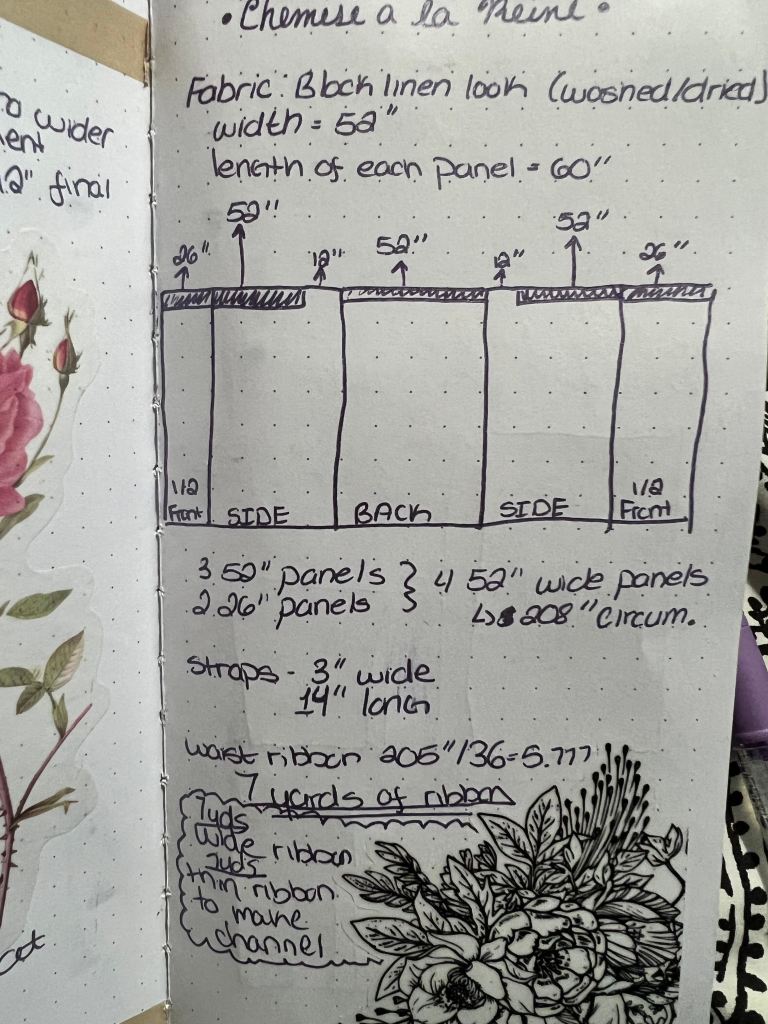
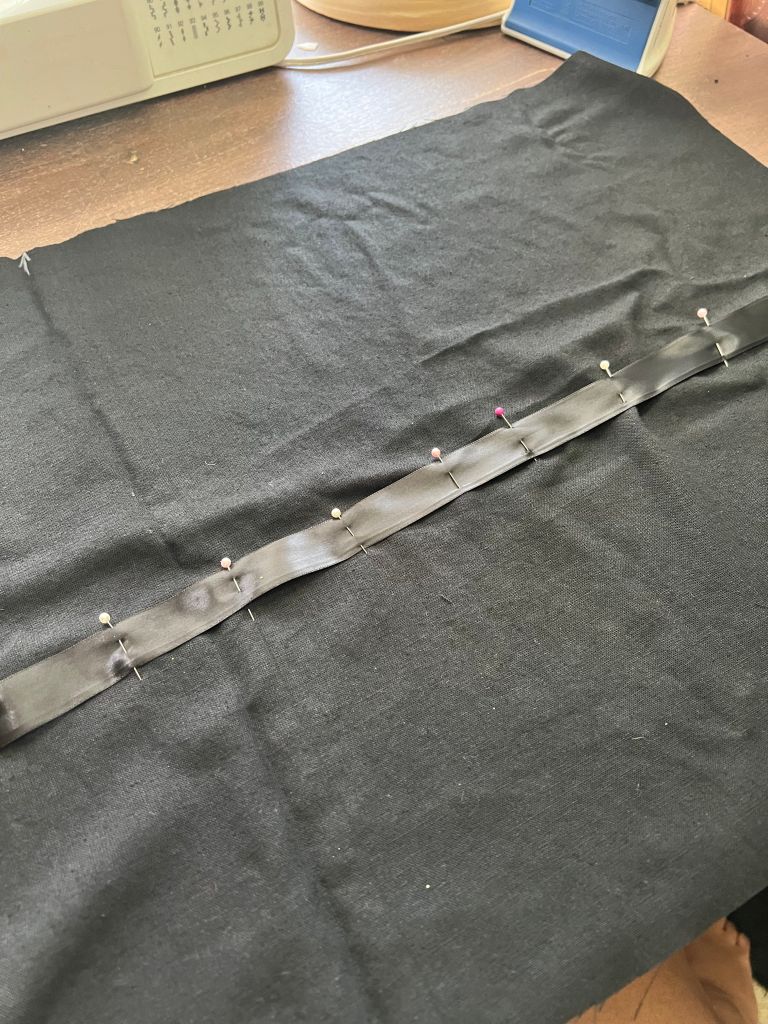
After sewing the panels together, I then sewed a channel for the ribbon along the top. The squiqly bits shown are where the ribbon was incased, and be sure to leave a 12″ opening (do not put ribbon in the casing) on either side of the back panel for the arms. Then you run the ribbon through each of the channels, gather to high heaven, and sew down at the back two anchor points, and the two side anchor points of the channels. For the front, you don’t achor the ribbon down, as you will use those two ribbons to tie the front of the gown closed. And being that there is a lot of gathered fabric, it closes beautifully once done.
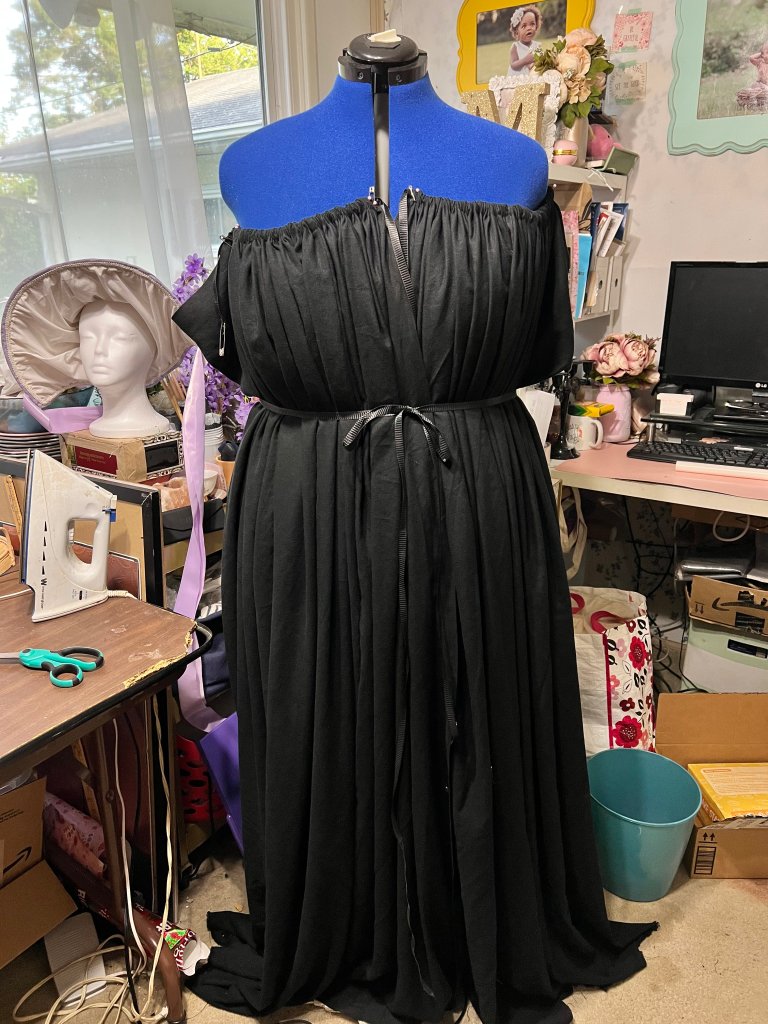
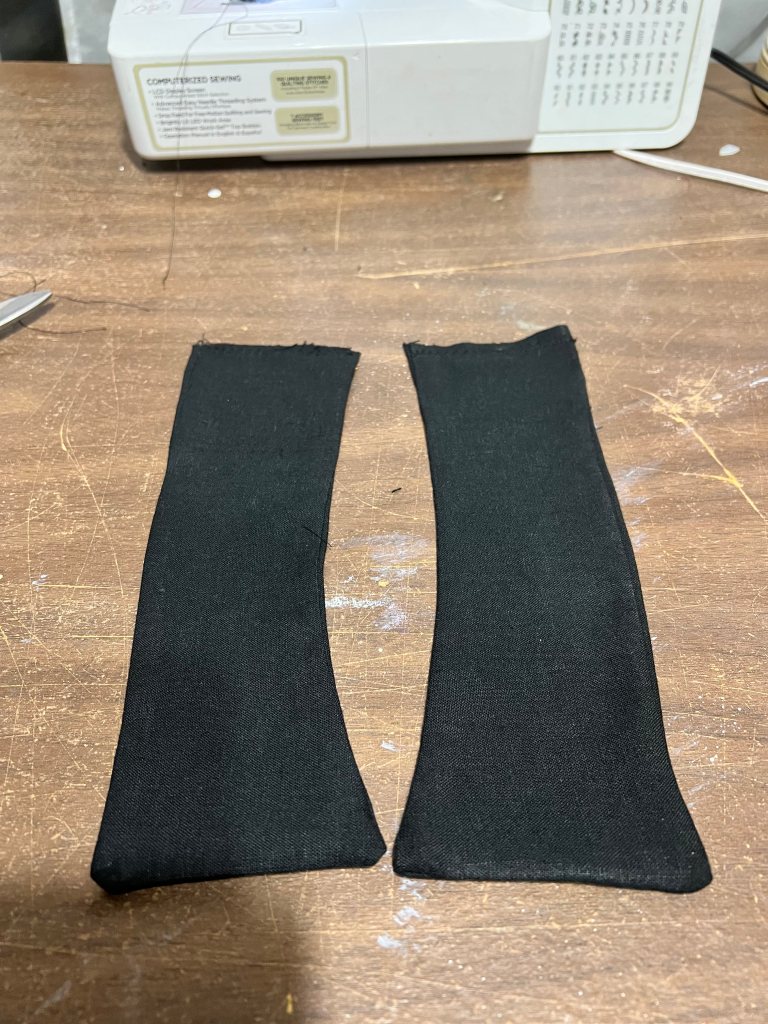
I found that I had to gather the back A LOT for it to not hang, since the weight of the fabric makes it want to drape down naturally. So again, lots and lots of gathering. After gathering and placing on the dress form where it would ideally fall on me, I made the straps. Now these were straightforward, two straps that ended up being about 10 inches in length and three inches in width, with a slightly curved edge at one side. At first, I thought that these would be two short and then I made a second set that was slightly longer, but remember that drape I talked about? I ended up going with the shorter straps.
Now at this point, I flipped the gown inside out and put it back on the dressform, then took a ribbon (as you can see) to tie where the waist band would be. I then marked where that would go. But during the final fitting, I decided that I wouldn’t sew in a channel for a waistband because tying it with the wide ribbon was enough to keep it in place.
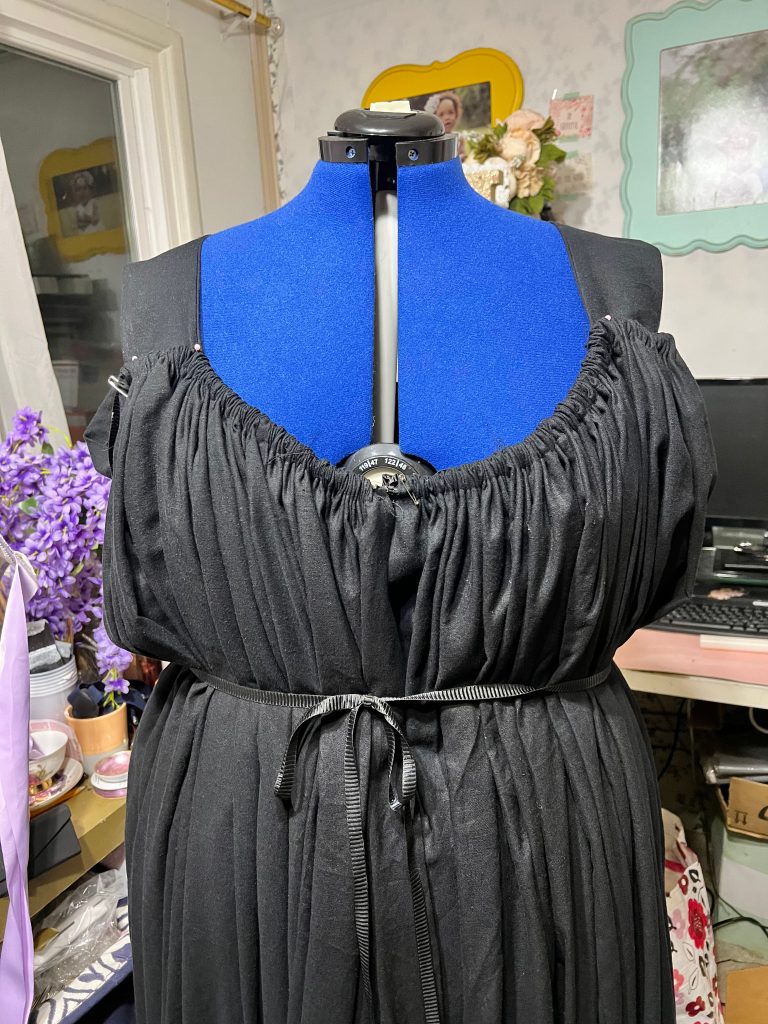
Moving forward to my favorite part: THE SLEEVES! I’m kidding! If you know me,you know I hate sleeves and they make me cry. My last two regency gowns, my friend Renee had to come over to help me, because my brain literally locks up when I think about doing sleeves. So of course, I wanted to go with something super simple for me to make. Now, with the chemise a la reine, there are so many paintings of this dress in various styles: fitted sleeves, fitted three quarter sleeves, poofy sleeves, etc. So I decided to go with a poof sleeve with one simple ruffle at the elbow. Definitely not hard. Cue, the panic.
So my good friend Shasta (ScifiCheerGirl on IG) came over to help me! So what she did was make a simple rectangle, and draped it from my shoulders to where the ruffle was. I then sewed a ribbon for the casing on the inside, and finished the top and the bottom of the sleeve. We had to do a little gather along the top of the sleeve to fit it, we then set it, and it worked!
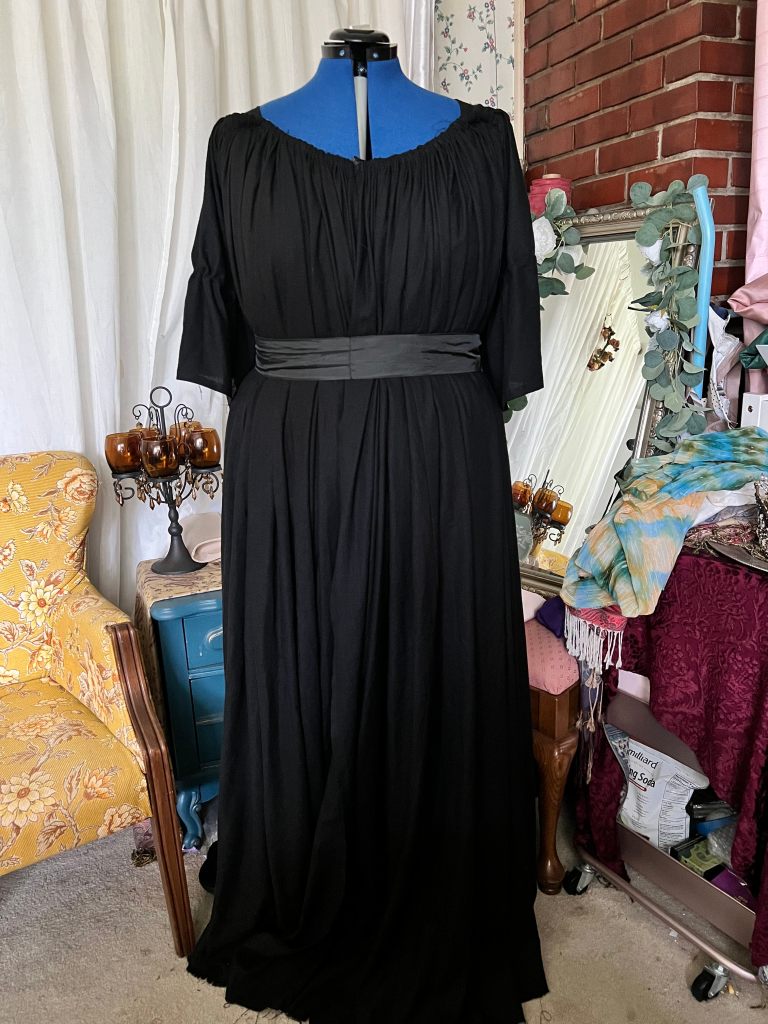
And with all that said, here is the semi-final product! I just got in a wide, deep-purple ribbon for the waist, and of course I still have to hem this beast (205″ of hemming to do!). Introducing…her:
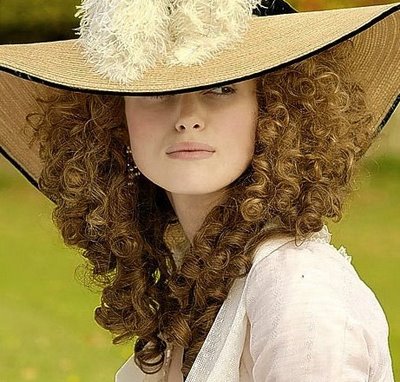
Now all I need is an epic hat like this one!
Now all in all, it took roughly 5-6 hours of work. I would have probably been able to do it all in one day, but again…sleeves, so it took two days. Also, the robe makes for a FANTASTIC vintage looking night robe to flounce around the house in with pretty undergarments.
